
WARNING: If you have not done my early tutorials, you will likely not be ready for this one. This one builds on a lot of what we've already learned. Remember--milk before meat! You can't do projects like this one until you've learned the basics! So if you haven't--go spend some time on the early tutorials, and then come back!
Here is a photo of the boxes we will be making today:
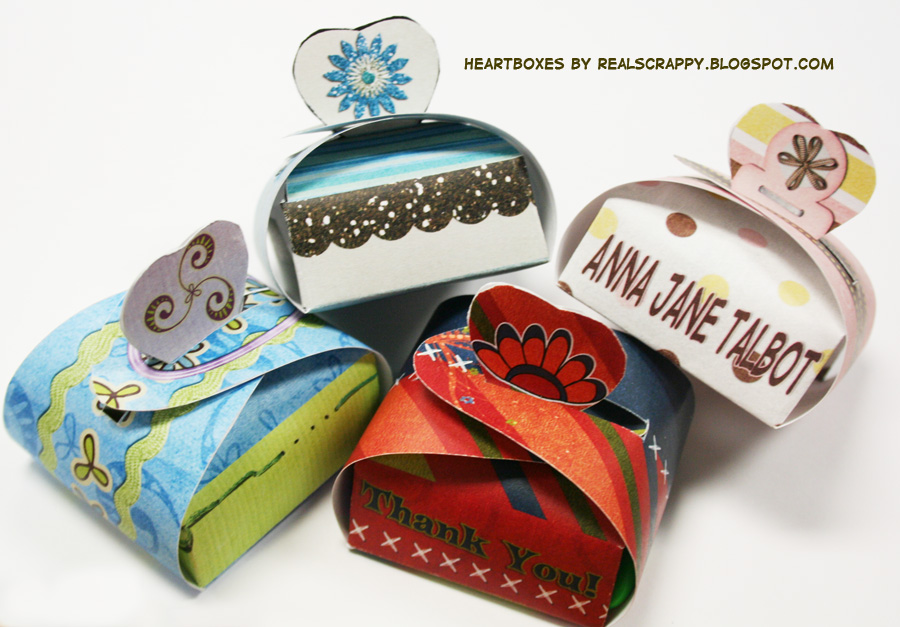
This box dates back to about three years ago when I attended a baby shower for my sister-in-law. The host had these darling party favors that were boxes just like this. Inside she had little mints to eat. I thought it was adorable and kept mine. I think I still have it...somewhere. Anyway, I scanned it into my computer and pulled it into Photoshop, and then created the template for this box. So this box is great for a party favor--that's what I really like about it. You can use it for things like baby showers, valentines, even as little thank you's instead of a thank you card.
Heartbox Template
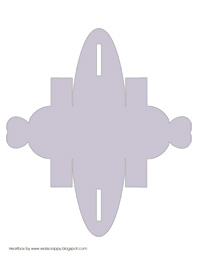 So this one is actually very simple. In fact--more so than my other patterns. The only tricky part is cutting it out--it's very curvy and you have to cut out the little slits. BUT, there is no gluing and very little folding. It's so simple!
*UPDATE* 1-1-18 - You may download this template from my Teachers Pay Teachers site. It is still free. It includes the Photoshop and PSD template, as well as four pre-designed ones ready to print and cut!
DOWNLOAD HEART BOX PATTERN HERE.
DOWNLOAD HEART BOX PATTERN HERE.

1. Download the template, and unzip it. Pull up the file in Photoshop. You will notice there are TWO layers--one says "lines" and the other "fill."
2. Pull up the kit you would like to use, and pull in the background paper you will be using.

3. Place the paper's layer ON TOP of the "Fill" layer. Then CTRL+Click on the Fill layer. You will now see dancing ants all around the box shape.
4. Click on the paper layer and do CTRL+C and then CTRL+V. You now have another copy of the fill layer, only now your paper is in the shape of your box.


6. Print on cardstock if you can--it's much firmer and better for this kind of thing.
Folding the Box
Now that you have it printed, puting it together is super easy!

2. When you cut it out, you have to cut out the slits on both ends. I have made these slits a little fatter than the original box I had, so that it's easier to cut them out with scissors. But for a cleaner look, use an exacto knife.


4. Next, pinch the two hearts together. Then pull one side over and slide the slit over the top of the two hearts. Then do the other side.


Notice that you can also add candy to inside your box. I fit the entire contents of a standard size of M&M's in one box.


This comment has been removed by a blog administrator.
ReplyDelete