First of all, there IS another way to curve your text, which is called Warp Text. Althought his method is simpler, it is also very limited. However, I would always attempt a Warp Text first and if it doesn't give you the effect you want, use the Pen tool.
Warp Text
 To use Warp, just create some text to work with. When you have the text tool chosen, you will see the warp button on the text toolbar. This will bring down a menu for you to choose from.
Just select one of the features and see what it does.
With the "arc" option, you can also warp your text downward by entering a negative percentage in the bend box. Honestly, I don't think I have ever used Warp Text on a scrapbooking page, but I have used it for badges and posters that I've made.
For example, I used it when I created this little stamp for a Literacy Night at my school, where we were focusing on Fantasy novels. I then used an action from Atomic Cupcake called "rubon" to make it look stamped.
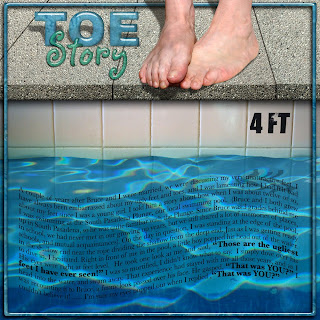
However, I do have an AWESOME example of another scrapbooker using this feature. I LOVE this page. It never occured to me to use Warp Text on an entire paragraph. Stefanie at StefStyle made this awesome page--without kits, mind you!
 I love this one! It's amazing! And a very funny story, too! I look at this page and feel totally incompetant. I have no idea how she did that title. And I love that she has certain important parts of the story bolded or in larger print. Brilliant.
The Pen Tool
Let me just remind you here and now that this is in no way a full tutorial on how to use the pen tool. Again--it's not my favorite tool and I've never really gotten the hang of it. But what I know should be enough for most of you who might feel a need to use it.
2. Next, click on the point where you want to BEGIN your curve.
3. Then click on the point where you want to END it.
4. Now here's the part that took me forever to figure out--when you click on the second point, DON'T UNCLICK. Immediately drag your mouse and you will see the curve between the two points. I would always unclick and then try to click in the middle to drag the curve where I wanted. Totally doe
sn't work that way.
5. Now, click on your Text tool.
6. When you drag your text cursor on top of the curve, you will see it changes slightly You'll see the I shaped cursor, but it now has a little curvy line next to it.
7. Click on your curved line, right in the middle. You will see a new diamond shaped point, and a blinking cursor. Type your text.
8. It will take several tries to get used to this--if your text is too large or too long, it won't fit. You may need to change text size, or you can CTRL+T the text box and transpose it larger. That will allow your text to fit.
Now, the pen tool allows you to make pretty much any shape. Just draw the two end points, unclick, then click and drag and the parts of the line you want to move in a wave. In this example, I did three different ones.
So, there's a quick tutorial on using the pen tool and warp. Hope it was helpful!


