Showing posts with label digital scrapbooking kits. Show all posts

Other Ways to Use Digital Kits & Photoshop - PART 1

This is the first of a 3-part series on other ways to use kits and Photoshop. I will be showing different projects I've done using my skills, that might give you a few ideas!

When I first started out with digital, I did what everyone does. I found any freebie kit I could get and downloaded it. But after awhile, I learned to not use freebies so much.
1. Freebies are often low quality
2. Freebies are overdownloaded--everyone will have pages with the same kits!
3. Freebies are often small and incomplete, with few papers and elements.
4. Freebies are often NOT WORTH the storage space.

Have I deleted all these worthless freebies? No. I don't have the guts. Plus, there have been times when I've found them to be useful after all. In fact, I've found SO MANY uses for my kits in other areas of my life, its unbelievable. I thought I'd blog about it and show you some of the projects I've done over the years with my kits and my Photoshop skills. SO useful.

First of all, I'm a teacher. I use my Photoshop skills in my classroom all the time. I also use them for my church projects A LOT.  I served in the Primary for some years and am now serving there again. The Primary is the church classes for the younger kids in my church. (I'm LDS.) So I've used my skills a lot for handouts and displays and stuff. And, of course, I've used them for personal projects like baby showers and stuff. I have SO MANY projects to share, I'm dividing this post into three! Today's post will show only SCHOOL projects that I've done in the past. The next post will be church projects, and the third will be Personal.

POSTERS

READ Posters

A few years back our middle school was really focusing on literacy. So I used my mad Photoshop skills to create READ posters. This was actually quite simple. I took a picture of the teacher, and then added the writing. A lot of times I used Actions to change up the lettering on READ. I made about 40 of these over the years.

Here's a little tip though--how did I get the word "READ" behind the teacher's head? I used my polygoal lasso to outline the top of her head. Then I just copied and pasted. This created a new layer of just to top of her head. Then I placed the layer on top of my READ layer. That simple.


Literacy Poster

I love this one. Our school also had a Literacy Night where Brandon Mull, author of Fablehaven, came to speak. It was actually a pretty awesome night. I made the posters for it. I think that when the posters are well done, people will assume the activity will be as well.

This one could never have been done without a LIBERAL use of ACTIONS. First, the title is using atomiccupcake's gold action. one of my persona favorites. The torn paper is actually a picture of the map of Middle Earth that I got off of Google Images. I used my polygon lasso to cut a few holes in it. Then I ran atomiccupcakes burned edges action to get that burnt look.

Then there are the staps. Those are so awesome. I created those with regular shapes and text. Then I ran another action. I can't remember which! I think it was atomiccupcake's Rough Lithograph. I'll have to check on that one.

Ballroom Poster

At my school I ran a ballroom program for a few years. So I created this and many other posters to advertise for it. I used funny sayings about dance to attract the attention of my target audience--junior high BOYS of course. And it worked! In the three years I did ballroom at my school, I taught over 100 boys how to dance! And that many girls, too! Advertising totally works!

All this required was a stroke border (I draw a shape, add a separate layer stroke, and delete the original shape) Then I silhoetted the picture, added the text, and done! Very quick and easy.

Musical Poster

Our school does a school musical every year. This was a poster I made for a prop. I took the photo, silohetted the picture, and added the text. I used an ACTION on the text--it was atomiccupcake's sparkle action. For the border, I used atomiccupcake's gem action. I demonstrated that one in lesson 10.

Programs

I also did the program for the school musical. I'm not going to post a lot of it here, though, since it says the names of my students. But here's the picture section that went in the center section of the 8 page program.
Thank You Cards

For a project at school, I needed the help of other teachers. So to thank them, I made these thank you cards. So I made some that looked like this, using my kits. Now, I had the advantage of a really nice color laser printer, but I'm sure it would work on any decent printer. I printed it on one side, turned it over, and printed it on the other. Then cut it out. I took a few tries to get it lined up just right. I ended up making a front and back template, so that it would print properly and all lined up.

DVD's
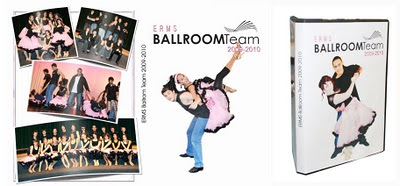
I am very good about getting all my home videos transferred to DVD as soon as possible. I know if I leave them on tapes or even stored digitally on my computer for long, I'll forget about it. I use Photoshop to create my menus for my DVD's. I use a program called Pinacle to create my DVD's and stuff. For my ballroom team, I used Photoshop to create the DVD covers and everything.  And, of course, for the covers I silhoetted the picture first. I talk about this in lesson 13.
For my personal DVD's, I use kits all the time. I create a background like this:

Then I just add the menu on top of it. I then create a CD cover for it with the same kit, and print it on CD labels. I know, I'm a total nerd. But oh well.


And one last one for my teaching stuff:

In my Keyboarding classes the kids earn cars that they put up on the wall when they get a speed of 25 wpm or more on a 3-minute timing. I even used my digital kits to make them these cute cars. I have a whole bunch of different ones--they get to pick their car. They like that. :)


Ok! Next post, part 2, will be all church related projects!


Lesson 8: Kit Resources

*UPDATED JUNE, 2013*
Ok, let's take a little break from all the tutorials and just talk about kits. In this post I will list some of the sites that I get my kits, and where you can get good freebies. I am sure that I will be going back to this very post as time goes by and adding to it, as I discover more and more good places for kits. Throughout this post I will show some of my favorite kits from my favorite designers--though, I bought some of them a long time ago and they may not be available anymore.

Once again, a kit is a set of files which include papers, elements, tags, ribbons, alpha, and so forth, all of which match with each other. As you can see
from lesson 7, creating a page with a kit is much easier. You just choose what you want. Kits are created by talented designers who sell them online. Some designers are, of course, more talented than others. And some just have a style you might prefer. Kits come with a Terms of Use policy, in which you are reminded that sharing the kit is illegal, that (most likely) the kit is for personal and non-commecial use only, and how you may use the kit. Its important that you read and abide by the use policy--someone put a lot of work into creating these kits! They should be paid for their work.

However, sometimes designers will offer freebies, in order to increase traffic to thier site or blog, or to get their work better known. They also will do sales from time to time--I am always on the lookout for those! When you start, you may want to just get a few freebies until you feel good about your skills. But eventually, you will want to put up the money to buy kits. It's worth it. You were oh so willing to buy all kinds of crap for paper-scrapping, remember? Well, this is no different--except that the kit will never be used up and you can use it over and over again.

Now, there are a MILLION kits out there. And everyone has their own criteria, but this is what I look for in a kit:


  • Price. Kits can range from $2.00 to $15.00. I can't believe anyone would pay $15.00 for a kit, no matter how good it is. MAYBE if it were a really, really large kit, but even then--I've gotten mega kits for half that price. So, for me, I won't buy a kit unless it's under $5.00, unless it happens to be exactly what I'm looking for, or it's a really large mega-kit (which is usually a kit where several designers contributed.)
  • Content. When you read the description of a kit, it will tell you how many different papers and elements and so forth there is. Pay attention to that--if the price is higher, chances are the kit is larger. Still, I've bought smaller kits for $2.00, and they were perfect for just one layout--which might be all you need.
  • Quality. Not all kits are created equal. A lot of the freebies out there really aren't that great. When I first started, I downloaded anything that was free, whether I liked it or not. I ended up with a lot of large files that took up a lot of space, and that I never used. Pay attention to the quality of work--as you do more scrapbooking, you'll be able to tell the difference.
  • Can I Make That? As you get better at digital scrapbooking, you'll learn to make your own elements. Now, I'm not in the business of creating kits--and some of the stuff these designers do it beyond me--truly amazing. But, sometimes I see something in a kit and think, "Yeah, I could make that myself" and then I might think twice about purchasing it.

And here are some of my favorite websites:

Gotta Pixel - This has become my go-to site, the first place I look when I need a new kit. Their prices are reasonable, and they are always having sales. I usually wait until a kit is on sale to buy it, so even though most kits on this site are priced at about $4.00 - $8.00, I usually get them for less than that if I time it right. My favorite designers on the site are Linday Jane, Connie Prince, Trixie Scraps, and Jen C Designs. But there are many others I have bought from.

Lindsay Jane Designs - I discovered Lindsay Jane in the very beginning--she's been with me from the start! I own probably 60% of all the kits she's done. I love her work. And it's also very fair priced. Her kits are about $4-5.50, and she or the site she is featured on often has sales. She also has a blog where she gives away freebies. Lindsay Jane sells her stuff on Pickleberry Pop and Gotta Pixel

Connie Prince - Connie and Lindsay Jane are my two favorite designers, and I own more stuff from them than any other. She's a designer that just fits my style. Her kits are well-priced, big, and absolutely beautiful.  I've also dealt with her personally over email requesting permission to use her kits for this site in my box tutorials. She's very kind and helpful! I just adore her work! She also has her own blog that often has previews and freebies. I highly recommend her! She also sells at Gotta Pixel.
 

Atomic Cupcake - This has been one of my absolute FAVORITE sites for a long time--but it closed down last year. She had some great kits, but the Actions were the best. However, I have recently discovered that you can download her actions off of 4Shared for free! You can find the download here. I don't know how long this link will last, but it DOES work! Yay!

Designs by Krista - I love this woman. She has some of the best stuff on her site. Her kits are high quality, and are a decent size. Not huge--you'll probably use every single embellishment and paper she gives you on one or two layouts, but the cost is just right! Here kits are usually only $2.00 and she even has some $1.00 kits. I just love her work, and you get a lot for what you pay for. Kits are getting more and more expensive all the time--it's nice to find something larger than a mini-kit or a couple of frames for $2.00!
Peppermint Creative
- This is a "tried and true" site where I'm sure many scrappers would point you to. They have a new freebie every month or so--and these are really high quality. Then, in the "coordinated kits" section, you can buy previous freebies for only $3.00. These are really excellent kits. I have all of them from the last few years--I check this site religiously!


Shabby Princess - This site also has some great freebies, though I haven't checked it in awhile. What's great about them is that they have several old freebies on there that you can still get. But they don't update new freebies very often. Still, the ones they have are definately worth your while, and can be a great starting point as you begin didgital scrapbooking.


Scrapping Simply - I'm also new to this site. It's a site I will definately bring up again when we are talking about printing, since that's their main focus. But they also have some great freebies. Just go to the site and click on freebies, and there you are!

Digifree/Craftcrave- When I first started, I went to places like digifree to get free kits. This site, and many others like it, will search other sites for freebies and put them all in one place. On the upside, it's a great way to find freebies! But it's also a great place to find, well, junk. Be careful what you download--look it over and make sure it's high quality. Most of my stuff in my "miscellaneous" file that I really need to clean out and never use, came from this site. Still, it's a great place to start as a beginner. This site has recently been changed to Craftcrave, and I admit I haven't really checked it out in a long time, so it may have improved.

Summertime Designs -I just discovered this site today and thought I'd add it to this post. The author, Summer Driggs, creates some great FREEBIES and put them on her blog. She has a whole list of them on the right that makes it easy to sort to the one you'd like to download. They are all free! The only problem is that they take FOREVER to download from 4Shared. But--it's free so it's worth it, right?
Cherry On Top - I ordered a few kits from this site and I really like them. It's still pretty new for me, but I reccommend them. I liked the feature of shopping by color. I needed a yellow kit for my cover for my 2011 yearbook (for some reason i can never find a yellow kit!) and I found what I wanted on this site. I just checked it today and saw a lot of cute kits on sale for reasonable prices.

Twopeasinabucket - This site recently closed its digital store, but I never bought kits from there anyway because, although they were beautiful, they were WAY pricey. However, I still want to mention it becuase they have a great digital scrapbooking forum with a HUGE amount of traffic-- digital scrapbooking forum--if you have a question, you can create a thread and I guarantee you there will be SOMEBODY who knows the answer! I actually had a really great experience on this website--I needed a kit that matched my nursery for my twins, and on the forum I found a designer willing to help me! Read all about it here.

Now, these are just a few sites. I don't want to overload you with too much! And honestly, in all the years I've done this--these are pretty much the only sites I've bought from. I really need to expand my world, here! So if YOU have a site you love, please list it in the comments section--I'm sure I and other readers would love to know your favorite designers/websites.


Not Using Kits


Now--after all that about kits, I want to remind you that you do not HAVE to use kits to make a great page. My first two books that I digitally scrapbooked I did not use kits. I simply created a a background and used it for each page. I wish I still had the .jpg files for those two books, but as I don't, here's some rather bad pictures of a page spread from each.


My first book, which was my love story, was incredibly simple. I drew shapes (we'll do that in the next lesson) to make a red background, and then a cream colored page on top. Then I saved it. Whenever I started a new page, I pulled up the same background and saved it as a new file when finished. That way, every page looked the same. I'd just add text in the same fonts, and then a few pictures with a stroke and shadow. That's pretty much it. And I still love that book--I'm actually really glad it's simple like that.

My next book was my first year of marriage, including my wedding. I knew a bit more about scrapbooking at this point, but still didn't use a kit. The background was the same on every page, as you see in the example. Then I did all my writing on a vellum I created (again, we'll cover that in the next lesson) and I also created my own eyelets. That's it. Each page was different, but used the same velum and the same eyelets. And it's beautiful. I'm glad I kept my pictures whole, with only a small stroke and shadow.

So there you go! I hope this was helpful!

Lesson 7: Puting it Together - Making a Page

UPDATE:

The video on this page was not working very well, so I created a new one today! Please enjoy this 8-minute video that will show you a how to create a simple page, step by step. If you haven't read my previous lessons on "the five things" you may want to read them and learn them before attempting to follow this tutorial.

This page to the right is the page we will be creating in the video.

Now, in order to do this, you are going to need a kit. The kit I used here, though it was once free, is no longer available. I got it at peppermintcreative.com. That site has a free kit available at:

http://www.peppermintcreative.com/index.php?main_page=downloads

Their previous free kits are available on their site for only $3.00 if you click on Coordinated Kits on the left. They are definately worth getting!

Before we begin, there is also one more tool I will be introducing in this lesson, and that is the marquee tool.
This tool will allow you to select an area of a photo or picture. Then you can use your arrow tool to cut and paste it as a new layer, or drag it into another photo. You will see a demonstration of it in the video.

If you are going to follow this tutorial, have Photoshop open, as well as your picture file and your kit. (Remember, after you download a kit, you will have to unzip it. You will need to download winzip in order to do this. You can find it here.)

Lesson 4: Manipulating Photos

Ok--today's lesson is about how to manipulate photos in Photoshop. This is, of course, a HUGE area, but I'm not going to cover every detail--my goal here is to teach you five things that will help you create a page. I will only show you the most fundamental and basic things about manipulating photos--the first of which, is cropping.

Cropping
The crop tool looks like this. You may recognize it, as it's the same in Word and other programs.

Now, you are going to want to use the crop tool BEFORE you pull the photo into your page. This is, obviously, because if you try to crop it AFTER, you will end up cropping your whole scrapbook page.


1. Open Photoshop

2. Create a blank page in the size you want for a scrapbook page for later.

3. Pull a picture into Photoshop, but NOT into your scrapbook page.

4. Click on the crop tool

5. Draw the size you want. You can resize it after you click and drag to make it exactly what you want.

6. Press Enter.

7. Pull it into your scrapbook page. (It may be big, but don't worry--we're fixing that next.)

That's it. However, Photoshop DOES have one useful little tool. When you click on the crop tool, notice that the options tool bar changes. If there is a certain size you want, you can enter it into the width and height boxes. I do this if I want every picture on my page to be the same proporitons. Or if I am doing a full bleed picture and I want it exactly 8 1/2 x 11.


Transform

This is probably one of the most imporant tools you will use. Tranform allows you to change the size of your pictures. The shortcut is CTRL+T, or you can go to Image, Transform, Scale. But--why would you? That takes WAY longer, and you use this tool A LOT. So just stick to CTRL+T

1. Go to your scrapbook page where you have pulled in the photo you just cropped.
2. Make sure you have the layer of the photo selected.
3. Press CTRL+T. You will now see that the photo has clear boxes on the corners and sides. These allow you to resize the photo.
4. Place your cursor on the corner and drag. This will change the size.
5. Press enter when finished. (Don't forget this step! Or you will be stuck in transform and won't be able to do anything else!)

Now, here are a couple tips for transforming:
  • If you want the picture to keep its proportion when you resize it, hold down the SHIFT key as you click and drag.

  • Always resize from the corner if you want to keep the proportion of your picture

  • If you want to SKEW your picture, try holding down the CTRL key while dragging. I've rarely needed to do this, but it's good to know.
  • You can also grab the corner and and tilt your pictures.
Curves


Now, there are SO many ways to mess with the color and lighting on a photo--I'm only going the show you the ones that I use the most. And to me, Curves is the best way to do this. The shortcut for curves is CTRL+M. Or, you can do the long way and go to Image, Adjustment, Curves.

Curves allows you to change the lighting of your picture. I usually lighten up nearly every photo I've got. When you pull it up, you will see a staight line. I usually pull up the top and down the bottom, so the line looks something like this.

But, this is something you'll just have to experiment with. You'll get it. If you have CS4, you can also click on the picture of the finger, on the middle left, and then use your mouse cursor on your actual picture to lighten and darken your picture.

Usually, curves is the only adjustment I use with my pictures. There are a few others under Image, Adjustment that you will want to mess with. There are also some important features on the image menu you may also want to mess with--particularly image size and image rotation.
Saturation & Color Change
Saturation is how much color is in your photo. It is possible to remove ALL the saturation, which would make your photo black and white. Or you can just take out some of it, so that your photos look a little more aged.
The quick keys for making your photo black and white is CTRL+SHIFT+U. Make sure you have the right layer selected!
You can also go to Image, Adjustments, Saturation. This allows you to gauge how much desaturation you want. Just move the adjusment lever and watch the change.
Notice there is also a color lever at the top. This allows you to change the colors in your photo. Now, I don't use this much on actual photos, but say you have a ribbon that you'd like to change the color of? Using the Saturation and Color options, you usually can get a pretty close shade. Also try checking the "colorize" box, this will give you a wider range.
Other Notes
There are a couple other simple things I want to tack on to this lesson that will make your life much easier.
  • CTRL + and CTRL - will allow you to zoom in and out of your page. I use that ALL the time.

  • The History bar is very important! CTRL+Z will only take you back ONE step. If you want to go back farther than that, look at your history bar. You should already have it up by default, but if you don't go to Window, History. This will show you a list of all the actions you've taken. You can just scroll it back as far as you want. There IS a limit, though--it will only go back so many steps, but it goes back pretty far.
Now, watch the video to see me doing all these steps!


Manipulating_Photos
(click to view)

Lesson 1: Where Do I Start?


Ok. Let’s talk money. That’s what you really want to know, right? What’s it gonna cost me? What do I need? Now remember this: old-school scrapbooking had a cost, too. You had to buy the books. You had to buy the page protectors. You had to buy paper, expensive elements, and don’t forget the expensive cutting and punching tools. You bought the big massive bag to carry it all in.

Well, Digital Scrapbooking has costs, too. In the long run, I think it’s still cheaper and has a LOT less waste—you don’t buy stuff you don’t use all that often. But, you will still have to fork out a bit of money to get started. As you get into it, you’ll be ready and willing to spend more on what you know you need. But to start, there are a few things you’ve got to have.

1. Photoshop. You’ve just got to do it. Take a deep breath. And BUY IT. You will never regret it! (unless, of course, you never use it!) At the very least, Photoshop is a great program for cropping and editing photos, changing the size for emailing, etc. I use this program EVERY DAY, and not just for digital scrapbooking. It’s worth every penny. But—how many pennies? Well—yeah. It’s not cheap. Still, there are a lot of ways to get around paying full price—which I believe is in the $600 range!

 
  • Free Trial: If you would like to try out the program before buying it, you can always download the free trial. You can get the Free Trial for Photoshop Elements here. If you want the free trial for the full version of Photoshop CS5 (which I recommend if it's in your budget to buy it) get it here
  • Older Versions: You don’t have to get the newest version. CS5 is the newest version and just BARELY came out. I haven’t used it. The differences in versions is slight—you can use an older version just easily as the newest. Using CS4, CS3, CS, or even Photoshop 7, is just fine. You can find these on ebay or search on websites.
  • Photoshop Elements: Photoshop also has a “watered down” version called Photoshop Elements. I haven’t used it myself, but for the normal user, it’s just fine. Sure, it doesn’t have all the features that the full version has, but who uses all those advanced features? Elements is just fine for digital scrapbooking. I think you can get it for about $100.
  • Student Discounts: If you have a college student in your family—BINGO!! Just have them contact their university bookstore for discounts. They can usually buy it for about $250.
  • Ebay: Check Ebay for people selling older versions. Just read carefully and make sure you are not getting an upgrade or a tutorial cd or something—make sure you are getting the actual program. I used the old Photoshop 7 up until two months ago, and it worked just fine for me—even if it DID come out in 2002.
Many people argue that there are cheaper programs than Photoshop that you can use. I don’t know about those programs. That’s your choice. But this blog is about Photoshop, and it really is the best. As I show you tutorials, they will be done in Photoshop CS4, but most of what I teach is the same in older versions.
2. Printing. I will have a later post that goes into a lot more detail about where and how you can print your work in Lesson 11. But let’s just say this for now—printing is, of course, an unavoidable expense in digital scrapbooking. It’s the price you pay for the ease of using a computer and not having to deal with all the other crap. The way I see it, there are basically three ways to handle printing:
  • Print it yourself: If you are a lucky rich person who has a great printer, you can print it yourself. If you choose this option, you will need a LASER color printer-don’t use a crappy ink jet! You will also want to buy nicer paper—not just regular cheap printer paper. And you will have to create your pages in 8 ½ x 11 and not the traditional 12x12—unless you have a 12x12 printer and—if you do—can I be your friend?
  • Print it page by page: Another option is to pay as you go—print pages as you can afford it. You can go to places like Costco, Sam’s Club, or online places, and print your pages one by one. This is great if you can’t afford to print the whole thing at once. You must buy some sort of scrapbook—even the old traditional ones will work—and after you have printed the pages, just slip them in the page protector. Costco and Sam’s Club allow you to print on 12x12, 8 ½ x 11, 8x8 and other sizes. We’ll discuss actual prices later, but bank on about a dollar to two dollars a page.
  • Print it in a bound book: This is the option I use. There are many companies online that allow you to upload your book, choose options, and then they print it and mail it to you. This probably costs about the same, maybe a little more, than printing it yourself. And you have to pay it all at once in a lump sum. My last book cost about $120 to print. But that was 100 pages long! I like this option the best because the books look so nice. Still, be careful. Some online companies charge A LOT for their books. Make sure you shop around for the best deal.
3. Kits and Actions: Again, we will talk about kits in Lesson 8, and actions in Lesson 10 , but here’s the basics. Kits are basically a file full of matching papers, elements, ribbons, tags, etc, that someone creates and sells online. Kits are not necessary for digital scrapbooking, but they make the job MUCH easier. You can buy kits from $2.00 to $15.00, depending on where you go and what you are looking for. In my opinion, they are WORTH it. I never buy the expensive ones—I usually only go as high as $5 or $6 if they are really good or have a lot in them. Remember this though: once you buy a kit, it’s yours. It doesn’t get used up. You can use those papers over and over. And if you want to get rid of it, delete it. No more boxes full of papers and elements you never used! (just file folders…) There are also a lot of sites that have freebies. As you get better at scrapbooking, you start to pick up on what is high quality and what is made by an amateur. Not all freebies are good, so be careful. Still, I’ll show you a few websites that have great freebies in Lesson 8. Actions are more advanced—I use them all the time, but they are by no means necessary. I’m not going to go into what they are right now—they will be covered in Lesson 10.
4. Storage Space: When you start out, you’ll probably be ok. But just know that eventually, if you get really into it, you will probably need to get more storage space. Kits take up a lot of space, as do Photoshop files. Eventually you may need to buy an external hard drive to store all your scrapbooking stuff on. This isn’t so bad—then you can take it with you if you want to scrap at a friend’s house with your laptop. External hard drives cost in the neighborhood of $100. I actually got a terabyte of storage and I love it! (no idea what it cost—it was a gift!)
Here are a few examples of some pages from my first two books. Sorry—I didn’t keep the original .jpg files because I didn’t foresee that I’d need them. But these are just photos of some of the pages. I wanted to show them here because these pages were done in Photoshop WITHOUT buying kits. You can create great and simple pages without putting out money for kits.


INTRODUCTION:

It’s overwhelming to think about how to get started in Photoshop. It’s a HUGE program, and not particularly user-friendly. It’s not something you can just figure out without some guidance or help, or at least some background knowledge. I already knew Fireworks when I started using Photoshop, which gave me a solid background on vocabulary and basics. But if you are totally new to this, it’s easy to feel overwhelmed. What I want you to realize is this: If you know how to do FIVE THINGS in Photoshop, you are ready to start digital scrapbooking. From there you can learn and improve more, but these five things will get you started. In lessons 2-6, I will be discussing these five things. They are:
1. How to open and manipulate files in Photoshop
2. How to manipulate layers
3. How to manipulate photos
4. How to add text
5. How to change layer styles
Lessons 2-6 will address each of these five things. Continue reading realscrappy! From here on out, make sure you own Photoshop and are ready to actually try what I’m teaching!