Here's a pile of the ones I've been working on:
WARNING: If you have not done my early tutorials, you will likely not be ready for this one. This one builds on a lot of what we've already learned. Remember--milk before meat! You can't do projects like this one until you've learned the basics! So if you haven't--go spend some time on the early tutorials, and then come back!
Now, there are A LOT of patterns for paper boxes out there. Most of them are made to print, but I like to take them into Photoshop and make them a little easier to work with digitally. In this post I will attach the Photoshop file I used to create the box in the tutorial, and I'll have a download of the completed box. Although I got the original box pattern online (so long ago I don't remember where) it's been altered quite a bit from it's original form to make it easier to use Photoshop.
 **NOTE** (January 2018) I have just updated the box pattern download so that is comes from my Teachers Pay Teachers site. It is still free!)
DOWNLOAD BOX PATTERN & SAMPLE BOXES HERE
You can also watch a tutorial how to design it in Photoshop here. It is for a different box type, but he concepts are the same.
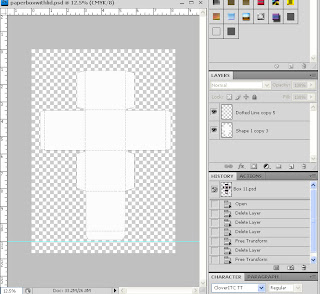
Step One: Ok. First of all, download the paper box with attached lid above. You'll notice there are TWO layers. The shape of the box, and the lines which tell you where to fold. This was one of my biggest changes--I wanted the two layers separate, so that the box pattern can be covered up, but the dotted lines stay on top of every other layer, so you can still see them when you cut the pattern out.
Now, if you haven't read my cut and paste tutorial, you'll want to do that before you do this one--I use those techniques A LOT in this.Next, you need to choose the kit you would like to use for your box. It doesn't need to be large--in fact, I often use the mini kit freebies I've downloaded for this sort of thing.
Step Two: Now that you have your kit, choose the paper you'd like to be the main background of your box, and pull it in to your document. You want the layer of this paper to be BETWEEN the dotted lines layer and the pattern layer.
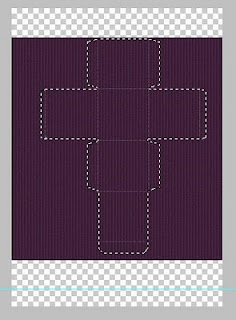 Click on the pattern layer. Then hold down the CTRL key and click on the picture section of the layer. You should now see "dancing ants" around the pattern.
 Now click on the paper layer. You should still see the dancing ants, even though you are highlighting a different layer in the layer toolbox. Do CTRL+C to copy. Then do CTRL+V to paste.
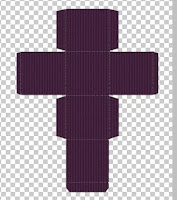
Now you have a new layer, which is the same shape as your pattern but in the paper you wanted. Delete the paper you orginally pulled in. Make sure the dotted lines layer is still on top.
Step Three: Now, you are ready to "decorate" the page with whatever elements you choose. It's important that you pay attention to what each square is and what direction it will go once you've folded and put together the box. It can be a real challenge to get the paper to line up correctly, since the four sides all go in three different directions.
For this tutorial, I decided to create a box with another color on the bottom and a ribbon. So, I pulled up another page, then used my marquee tool to select a rectangle roughly the size that I need. Then I clicked on the arrow tool and dragged it into my document.
Then I dragged in a ribbon and made it roughly the size I wanted using CTRL+T. I linked them together and then pressed CTRL+E to make them one layer. This will make it easier for me to paste it on the other three sides, and make sure that they all line up.
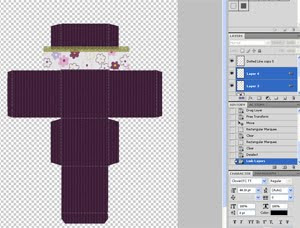 Now you'll do that same cut and paste trick that we did earlier. Click on page background color layer (purple for me) and do CTRL+Click. Then click on your new ribbon layer, and copy and paste. DO NOT DELETE THE ORIGINAL. Just move it out of the way. Place your new layer you just pasted where you want it.
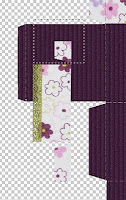
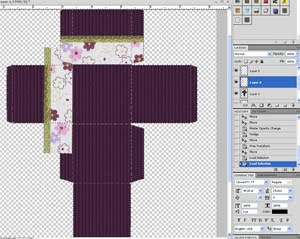 Now, get the old layer and do CTRL+T. Hovering your cursor on the corner, you'll see it turn into a bent arrow. This will allow you to turn the layer another direction by clicking and turning it. And repeat the same steps again. You may have to use your marquee tool to delete any excess that comes up when you copy and paste.
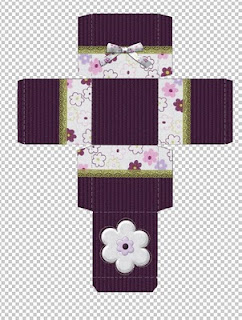 Do these same steps for all four sides. Then, just decorate the rest of the box how you want, keeping in mind what it will loook like once it's folded.
Step Four: Once you've got it how you want it, you are ready to print! I print this in a laser printer, but it will work fine on an ink jet. I also do it on white cardstock. You can print on regular paper, it just won't be very strong.
Step Five: After you have it printed, cut it out very carefully with sharp scissors. It's pretty important that you follow the outlines as exactly as you can--but I'm sure you know that.
Step Six: Now, you are ready to fold. The dotted lines should be visible--I hope you kept them as the TOP layer on your photoshop file! Make sure you fold right where the line is, and fold it evenly. This is a huge factor in whether your box will turn out "rickety" or not. Some of my boxes turn out better than others based on how I fold and tape it.
Step Seven: After folding it, it should be pretty obvious where it all connects. I just use scotch tape to tape the sides together.


what a great idea!
ReplyDeleteCute box...and great instructions!! I'm also glad to have found another 8.5 x 11 scrapper. Woo hoo!
ReplyDeletevery good step by step instructions.
ReplyDeleteMaggie
http://passionatelyartistic.com
what program are you using to draw the box
ReplyDelete@Allen--I'm not sure exactly what you are looking for, but I created everything in this post on Photoshop CS 4.
ReplyDeleteThis comment has been removed by a blog administrator.
ReplyDelete