Add a Stroke
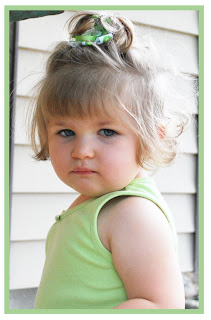
First of all, there's the super simple but not as cool way--and that's the way I've already showed you in lesson 6. (demonstrated in full on the video) Adding a stroke is simple and fast, and a lot of times I do it this way for that very reason. My other methods may look cool, but it can time consuming, so I don't always bother. Here's an example of a picture with a stroke border.
1. Double click on the blank area of the layer you want to change--in your layer menu.
2. In the Layer Style menu, check the "stroke" box.
3. Click on the WORD stroke, to get more options.4. Change the color of the stroke by clicking on the black box--remember, if you want to match a color in the picture, as I did here, just click on the color you want on your picture when the color picker is open.
5. Change the width of the stroke, and choose Inside, Outside, or Center. (This one is inside--that's why the corners are so sharp.)
6. Press ok. Remember, you can right click on the layer afterwards and choose "Copy Layer Style" then just click on the layer of any other photos you want the same border on, and right click and choose "Copy Layer Style."
7. I usually add a shadow as well as a stroke to most pictures. It also looks nice if you use a bevel.
Creating a Stroke on a Separate Layer
I learned this little trick in one of the .txt files that came with an action I bought from Atomic Cupcake. I think it was on the small silver action--another one, by the way, that it TOTALLY worth buying. Anyway, I've used this technique like crazy ever since. This can be used to create a stroke, like above, but when you make it on a separate layer, your shadow will go on the inside and the outside and it looks much better. We'll use this technique on the next two types of borders I show you. So learn it!
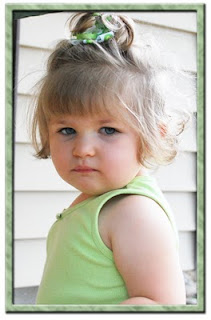 1. The first step is imperative--and I've shown it before on one of my previous videos. You need to hold down the CTRL key, and then click on the layer you want to border. Now, that's enough in Photoshop 7, but in the later versions, you need to make sure you click on the PICTURE section of the layer, not on the empty area, or it won't work. You know it worked if you can see the "dancing ants" marching around your picture in Photoshop. What you've done is not only select your layer, but selected the SHAPE of your layer.
2. Next you are going to go to Layer, New, Layer. Or you can click on this symbol on the lower right hand corner of your layer menu. Now, it's important you understand what you just did--you just created a new layer in the shape of those marching ants.
3. Now, go to edit, stroke. Choose the color of your stroke. Then if you want it inside, outside, or center. Choose a thickness--try about 30 px. Then press enter.
4. Now, your stroke looks exactly the same as if you had done it the easy way. But remember--it's a different layer than your picture. So double click on the stroke layer you just created and go to your Layer Styles menu. Choose a bevel and a shadow. NOW you should be able to see the difference. Sometimes I'll even go to Pattern Overlay (as discussed in Lesson 6). That's how i got the border to have a bit of a texture to it.
5. Keep in mind, though, that if you want to move the picture, the border won't come with it. So find the layers, highlight them both (hold down the CTRL key and click on one, then the other) and then link them. If you want them to be PERMANENTLY stuck together, press CTRL E. The only way to undo that is to go back in your history.
Using Paper on your Separate Layer
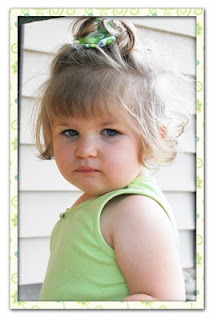 Ok, for this one, we're going to do the same thing we just did above, only we're going to add a step. What if you want the border to be made of the paper you are using in a kit? No problem. All you really need is copy and paste. Remember the shorcuts if you don't know them -- CTRL C is copy, CTRL V is paste.
1. So, do all the steps from above, only don't go into the Layer Styles. Just create a border on a separate layer. Color doesn't matter.
2. Now, open up from your kit the paper you would like to use.
3. CTRL click on the PICTURE part of your border layer, and press CTRL C. Or, Copy.
4. Now, go to your paper, and press CTRL V, or paste.
5. Repeat the step where you CTRL click on the PICTURE again, getting those dancing ants. Now on your layer pallette, click on the Background layer, which is the paper you chose. Press CTRL C.
6. Go back to your original picture and press CTRL V. You now have a border that is "cut" from that paper.
7. NOW go into your Layer Style menu (by double clicking on the new layer) and add a shadow or whatever else you want.
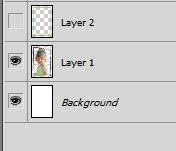
8. Keep in mind that your original stroke is still there--you may want to delete it, or at least HIDE it by clicking on the eye icon next to it. That makes it "invisible" but you can always make it visible again by clicking on the empty box where the eye is supposed to be.
9. This process takes only seconds--it may sound confusing, but watch the video and you'll pick it up quick. It's MUCH harder to explain than to do!
Using an Action on a Separate Border Layer
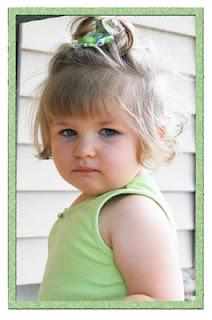 This last one I use a lot--adding an action to a border. Now, hopefully you've already read Lesson 10, which talks about actions. I will demonstrate in the video how to add an action, and I'll use the Sparkle action by Atomic Cupcake.
1. Create a separate stroke layer, just like we learned above.
2. CTRL Click on the stroke layer, so it has dancing ants all around it.
3. Choose your action, and run it.
4. Remember, depending on the action, it may require you to choose the color you want your layer to be in the color picker in your toolbar BEFORE you run it.
5. Pull the finished border back into your document, and place it on top of your picture. You may want to delete the original stroke you made.
**NOTE - I have had a little confusion on using this feature on SHAPES. If you are going to add a border like this to a shape, you have to RASTERIZE it first. So, draw your shape, right click on the shape in your layer panel, and choose "rasterize." Then you can CTRL+click and get the marching ants, and create your new layer.
Ok, now for a video!
Adding_Borders

Thanks for the tips! This will make my life much easier when I get ready to do my album!
ReplyDeleteSuper helpful having your blog to refer to while I work!!
ReplyDelete