1. The first is the one I gave a full tutorial on in my last post. Using a pattern (either one of mine or one from the Silhouette online library) use a screen capture to pull it into Photoshop. Then create an exact design with the capture as your guide. Pull the finished design as a jpg into your Silhouette software and use Reg Markings to have the Silhouette track your exact pattern. It will cut it out exactly. This is the method I used in my previous tutorial. It's the most time consuming, and the most likely to come out perfect. Also, remember that if you are creating your own pattern, in Silhouette go to File, Save to Library. This way you can use it over and over again!
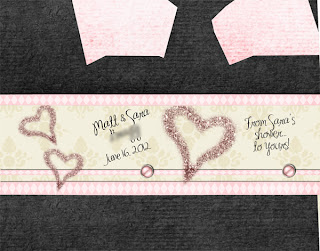
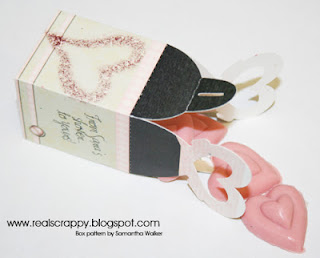
 2. The second method is similar--only its not so exact. I used this method when creating a box for a bridal shower party favor. I did not make this pattern. In the Silhouette, there is a pretty awesome online library. I bought this pattern by Samantha Walker for $.99. I still did a screen capture and pulled it into Photoshop, but I didn't make a template. I just placed the paper and designs roughly where I wanted them, using the screen capture as a guide. It's much quicker and easier than actually creating an exact template, but the problem is, it's a lot harder to ensure that everything will match up perfectly. The words might be off, or the design might not come together exactly as it's supposed to.Still, it also gives you all the Photoshop options like accind shadows and text, etc, that you can't do in the Silhouette. It takes some trial an error, and if you don't want to have to keep printing copies and wasting paper to practice it, it might be better to take the time to create an exact template and cut it out with registration marks. Still, it turned out very cute. I made little mini soaps and put them inside. It went well--until one of the guests thought it was a chocolate and took a bite...
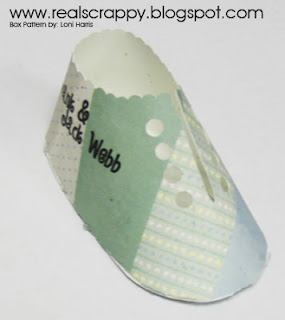
3. The third method is the simplest and has the least amount of control. You basically don't use Photoshop at all! I was in charge of a baby shower a few weeks ago, and this was what we had for the party favor. Only I had ribbon in the lace holes and candy in it! (wish I'd taken a picture of the finished ones--I had forty of them and they were all different and so cute!)
Again, this is not my pattern--I got this online for $.99 by Loni Harris. But what a cute pattern! I did find it much easier to use a glue gun for this one, though. Anyway, for this one I just opened up the Silhouette software and pulled in the papers I wanted to use. Then I used the  edit points button to adjust the paper where I wanted it. I used a kit by Lindsay Jane for this one. This is the easiest method, but you no longer have Photoshop abilities like adding shadows, recoloring or adding text. This screenshot is not of the above pattern, since I don't own it, but of one of my own patterns. This is what it looked like in the Silhouette software.
 edit points button to adjust the paper where I wanted it. I used a kit by Lindsay Jane for this one. This is the easiest method, but you no longer have Photoshop abilities like adding shadows, recoloring or adding text. This screenshot is not of the above pattern, since I don't own it, but of one of my own patterns. This is what it looked like in the Silhouette software.
For the type, I just copied and pasted it from Word. You don't want to use the text editor in the Silhouette because then it will be cut out. It worked out just great! This one was hard though because it didn't always line up exactly as I planned--sometimes you place the paper a little higher or a little to the side, and it throws off the pattern. Again--the only way to get it to cut EXACTLY where you want is to use Registration Marks. But they also limit the size of the paper you can use, adding larger margins.
I also wanted to throw in one last box I also made--this was for another wedding shower I was a part of in May for a dear friend fo mine. This was a design by Jennifer Wambach. She did the dress and the tuxedo. For this one I did method #2, but on a much smaller scale. Here are some pictures of the boxes, filled with kisses, from the shower!
I also wanted to add that I found a really awesome tutorial on this same subject aht, if you are still confused, might be helpful to you. She goes into much more detail about using the actual Silhouette software.


No comments:
Post a Comment