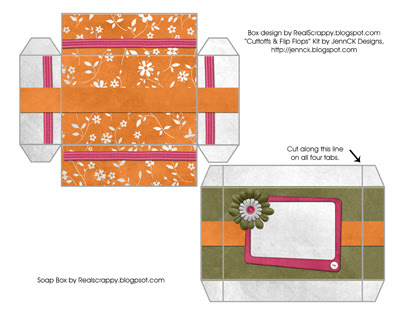
So this week I created a few bars of melt and pour soap for a thank you to a neighbor for watching my kids. Yes, soap-making is another little hobby I once had! Anyway, I usually put completed bars in cellophane wrapping, but then I thought--why not make a box pattern for it? So here it is--my newest box. It's really just a variation of my square box with separate lid--the size is just adjusted to be about 4 x 2 1/2.
*If you want to see any of my other box designs, pull down the "Projects with Photoshop" menu on the right.
**I also created a second, similar soap box pattern in my next post that has an attached lid.
For this box, I have several downloads for you.
1. The PSD file so you can create your own designs in Photoshop using kits you own.
Soap Box Photoshop File
2. The PDF file that is a blank template so you can print it on regular scrapbook paper.
Soap Box PDF
3. A free printable, downloadable and uneditable box made using
JennCK's kit, Cutoff's and Flipflops.
To create your own box in Photoshop using a kit you own, follow these directions:
1. Download the PSD file. Unzip it.
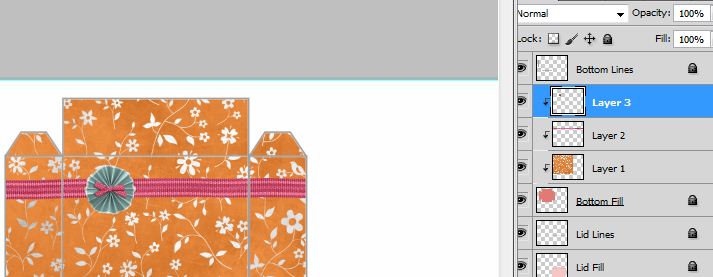
2. When you open the file, there are FOUR layers--Bottom Lines, Bottom Fill, Lid Lines, and Lid Fill.
Remember to place all elements for the bottom INBETWEEN the lid lines and the fill.
3. Pull in the paper you would like to use for your bottom. Make sure it is inbetween the bottom lines and the bottom fill layer. Place it directly on top of the Bottom Fill layer.
4. Do Alt+CTRL+G, or Layer>Create Clipping Mask. The paper is now "clipped" to the right size, but you can still move it around and edit it. (For fuller instructions on clipping masks, see
Lesson 24.)
5. Pull in other elements you would like to decorate your box with.
When you do, make sure you pull it in on top of the paper layer you just did. Then, do ALT+CTRL+G again to put it in the same mask.
6. Follow these steps for both the bottom and the lid. Until you are satisfied with your design.
7. When finished, print it on sturdy white cardstock.
8. Cut out both peices.
9. Cut the longer side of each tab, as shown, so they can be bent. The corner tabs on the lid are cut on one side and then folded under.
10. Use glue or double sided tape to adhere the box together. I have just started using double sided tape and it's SO much easier and holds quicker.
11. All done! The lid should fit very nicely. This size of box was chosen to accommodate a standard size bar of soap, but of course, it can be used for many things!


 So, after I created this post about making boxes for soap, I found the pattern to be lacking. I mean, the patternw as FINE, its just that when you put a heavy bar of soap in it, having a separate lid isn't very practical. You go to pick it up and the lid comes off and it just doesn't work as well. So I created a new pattern for a box with an attached lid.