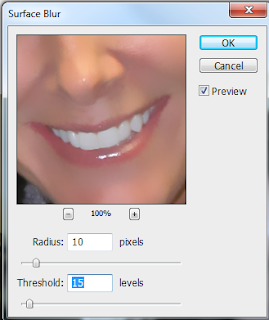
To get there, go to Filter>Blur>Surface Blur.
Here's what it does. This is a picture of one of my co-workers. She's beautiful anyway, and this feature can be used on young and old--it's not to make you look younger necessarily, but just to even you out--the flash can really make you look blotchy and shiny when you really aren't!
So you pull up the picture, then go to Filter>Blur>Surface Blur. Adjust the Radius and Threshold to where you want it. The more you mess with it, the more you will get an idea of what looks the best. So here's the picture side by side after the surface blur.
I just love how it evens the skintones but doesn't look totally "Photoshopped"
The other problem with this photo is the shiny forehead. So I found a way to fix that, too! It's SO easy and doesn't use anything we haven't already used on this blog.
 First, create a new layer by click on the New Layer button, located att he bottom of the layer pallette. Or go to layer, new. Then use the eyedropper tool to pick a color similar to the skin tone around the area you want to fix.
Next, choose your brush icon. Change the settings. Mode to "Darken" and the opacity to about 15%.
Then, just color over the shiny area until it's covered up. The actual coloring will take place on a separate, blank layer. You are not altering the original picture. You can easily go back and try again if it's not what you want. But, make sure the link or merge the layers when you are done.


No comments:
Post a Comment